Wooden Tag Project
- traciefoxcreative
- Oct 3, 2021
- 2 min read
A recent comment on a haul video I did on my YouTube channel from a lovely follower told me to check out the wooden tags at Dreamees in the UK. Well, I did and I purchased 2 sizes of the layers tags. Today I am creating using the larger tag and thought I would share the process with you. It is far from perfect but I am pleased with how it turned out.

The first thing I did was take the tag apart and gesso the base layer and the frame layer. I did not use the insert for this project.

Once It had 2 coats and was dry, I gave it a spritz of water and I sprayed with Pumice Stone and Salvaged Patina Distress Oxide. I then blotted it, and added more until I was happy with it, dried it and then spritz slightly with water again.

Once this was dry, I put the tag together.

I then removed the outer frame and used a pencil to draw around the insert so I have a good idea where I needed to add additional layers.

I then used a text stamp and embossing ink and heat embossed with Hickory Smoke.

I grabbed a stencil and staying as close to the pencil line as I could, I used Rangers Opaque Crackle.
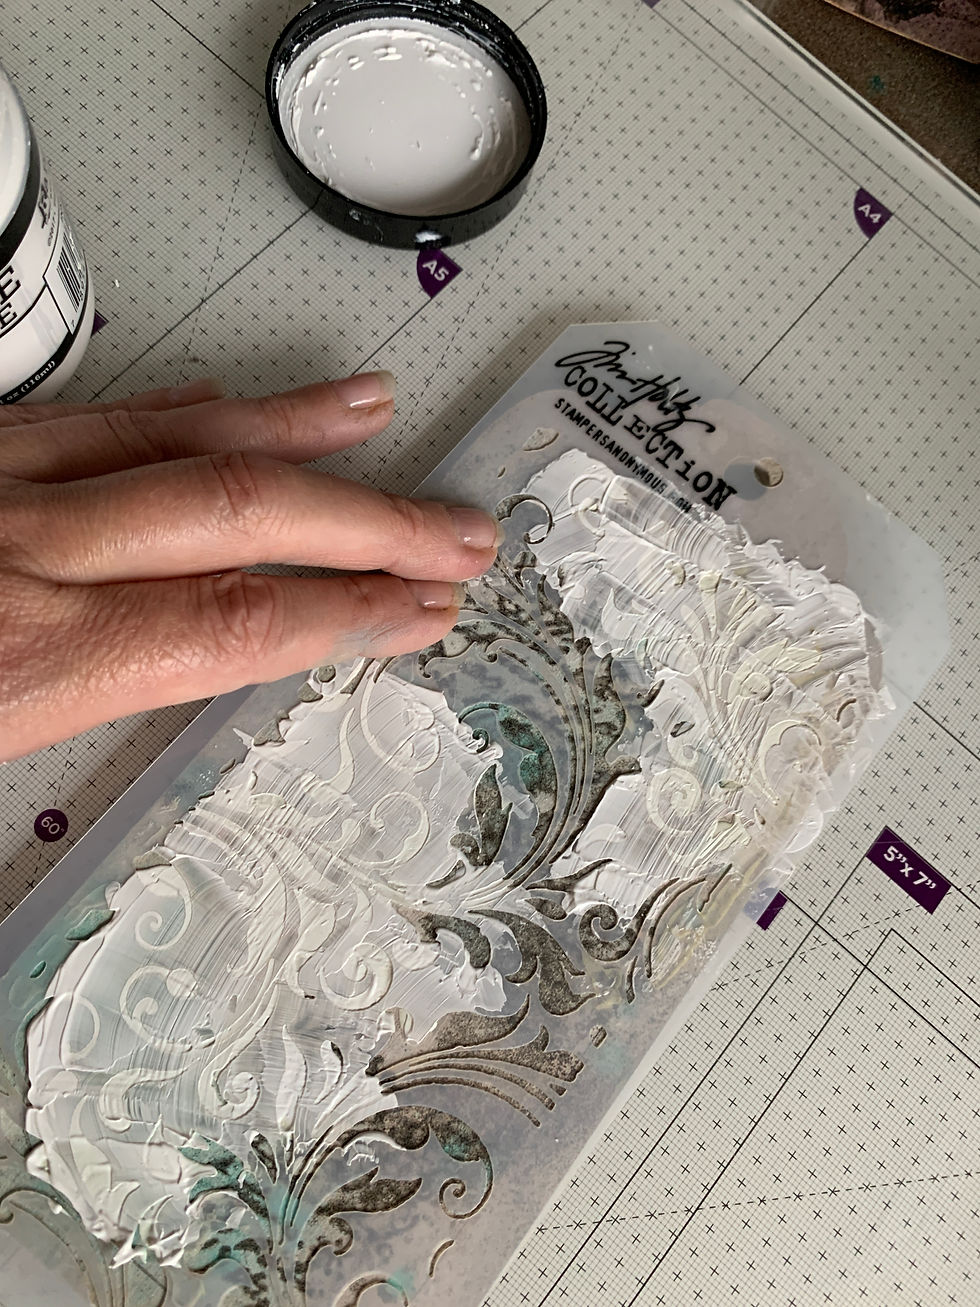
I used a palette knife to clean the edges so the frame would sit flush against the base.

I mixed Gathered Twig Distress Crayon with a little water, painting it over the crackle once it was dry.

Once this was all dry, I gave it a spray with Antique Bronze and Brushed Pewter Mica Spray.

As that dried, I applied a layer of Crackle to the frame part of the tag.

I added the distress Crayon and wiped with a baby wipe. And once dry again sprayed with Antique Bronze and Brushed Pewter Mica Spray.


To start my collage piece, I stamped a piece of watercolour paper and inked using Vintage Photo and I printed an image I wanted to use. I tore the stamped paper and I distressed the edge of the photograph. Then I backed the photograph with packaging paper.

I then created the collage with various ephemera pieces, I sewed some threads onto the collage and added an index clip. I sewed a small butterfly onto another piece and added a tiny clip. This was added with a piece of scrap cardboard to raise this elements slightly. I sprayed again with the Mica Sprays.


Once I was happy that the collage would fit nicely, I used Gorilla Glue Clear to attached the two tag elements and clamped it, to keep it in place until it dried, this was left several hours.


The collage piece was glued into place and I added seam binding to the top, that had been inked. Finally, I added a small charm with a bulb pin.


Thank you for your time, I hope this was useful and you try it yourself. You do not need all the supplies, you can use alternatives to create a similar project, changing the colours to suit your style. Take care, be creative and please share what you create!
Tracie xx


Beautiful, unique tag! Please provide the brand name of the crackle paste and inks you used.